Flamingos Print Has Arrived!

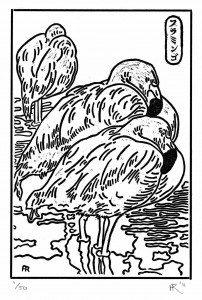
I finally finished the Flamingos print, and have put it up on the website.


For now, it is only available in Black & White. I may eventually get around to the multi-color version, but for now black will have to do.

To see more information on the newest addition to Porcuprints, check out the Flamingos Print Here!

Share
Posted in Uncategorized | Tagged , , | Comments Off on Flamingos Print Has Arrived!

Portland’s 4th Annual Letterpress Printers Fair!

This weekend I attended the Portland Letterpress Printer’s Fair organized by the lovely people at the Em Space Book Arts Center. The fair offers a place for printers and print enthusiasts to come together to share equipment, printed wares, and ideas. This year there were around 25 vendors from Portland and the surrounding areas.

Highlights:

  • Zebra Print’s folding printers’ hat demonstration. Victoria Sage helped visitors fold their own paper hat while explaining the history of the hat; letterpress printers worked in messy conditions, and therefore needed to protect their heads from ink. Each day the would create their own disposable hats.
  • Fortress Letterpress. Bruce Paulson and Rachel Demy run a custom letterpress shop online. This was their first year at the fair, and their work impressed.

    Portal Print by Fortress Letterpress

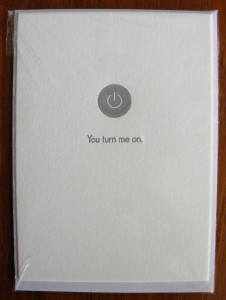
  • My favorite item for sale was from Twin Ravens Press. One of their greeting cards for sale had an Apple Computer power symbol with the saying “You turn me on.”

    "You turn me on." by Twin Ravens Press

Although these were just my favorites, everyone had amazing work. It was also a great way to meet everyone in the Portland letterpress community.

Links to participants:

Em Space Book Arts Center

Fortress Letterpress 

Independent Publishing Resource Center

Twin Ravens Press

Zebra Press

Share
Posted in Uncategorized | Tagged , , , , , , , , | Comments Off on Portland’s 4th Annual Letterpress Printers Fair!

New URL Launched!

Folio CIII has be rebranded! We are now Porcuprints at www.porcuprints.com!

With a new name and a new url, this is the beginning of new stage for us. Stay tuned for an Etsy Store and Facebook Page!

Share
Posted in Uncategorized | Tagged , , , , , | Comments Off on New URL Launched!

Art Historical Tattoos

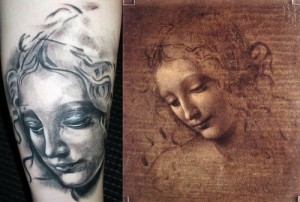
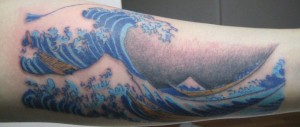
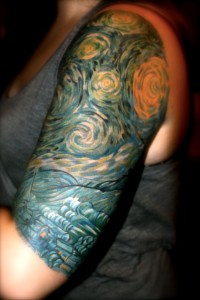
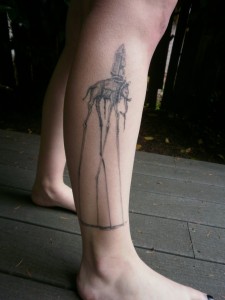
I love tattoos. Or rather, I love well executed tattoos that are meaningful in some way. Recently I have noticed a beautiful trend in tattooing; I have seen a lot of tattoos inspired by famous works of art! From Hokusai prints to van Gogh paintings, they span all art historical periods and styles. I wanted to share just a few that I have found here:

Leonardo da Vinci’s Lady of the Disheveled Hair Tattoo (Source: http://fyeahtattoos.com/post/1499699856/leonardo-da-vincis-lady-of-the-dishevelled-hair)

Hokusai’s Great Wave Off Kanagawta Tattoo (source: http://fyeahtattoos.com/post/6701901285/my-tattoo-of-hokusais-great-wave-off)

Vincent van Gogh's Starry Night Tattoo (source: http://fyeahtattoos.com/post/6991257887/starry-night-has-been-my-favorite-painting-ever)

Salvador Dali Tattoo (source: http://fyeahtattoos.com/post/6699267651/this-is-my-salvador-dali-tattoo-dali-is-one-of-my)

 UPDATE:

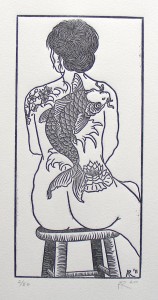
I have recently completed a woodblock print of a tattooed woman! I think she fits right into this group

To see more pictures and to buy this print, check out my Etsy listing here.

Share
Posted in Uncategorized | Tagged , , , , , | Comments Off on Art Historical Tattoos

Printing The Zodiac

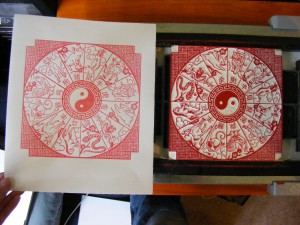
My latest print, Zodiac, was inspired by Chinese cut paper designs. The border pattern is a traditional design, and  I really wanted to print it in a bright red to mimic the traditional color of the cut-paper.

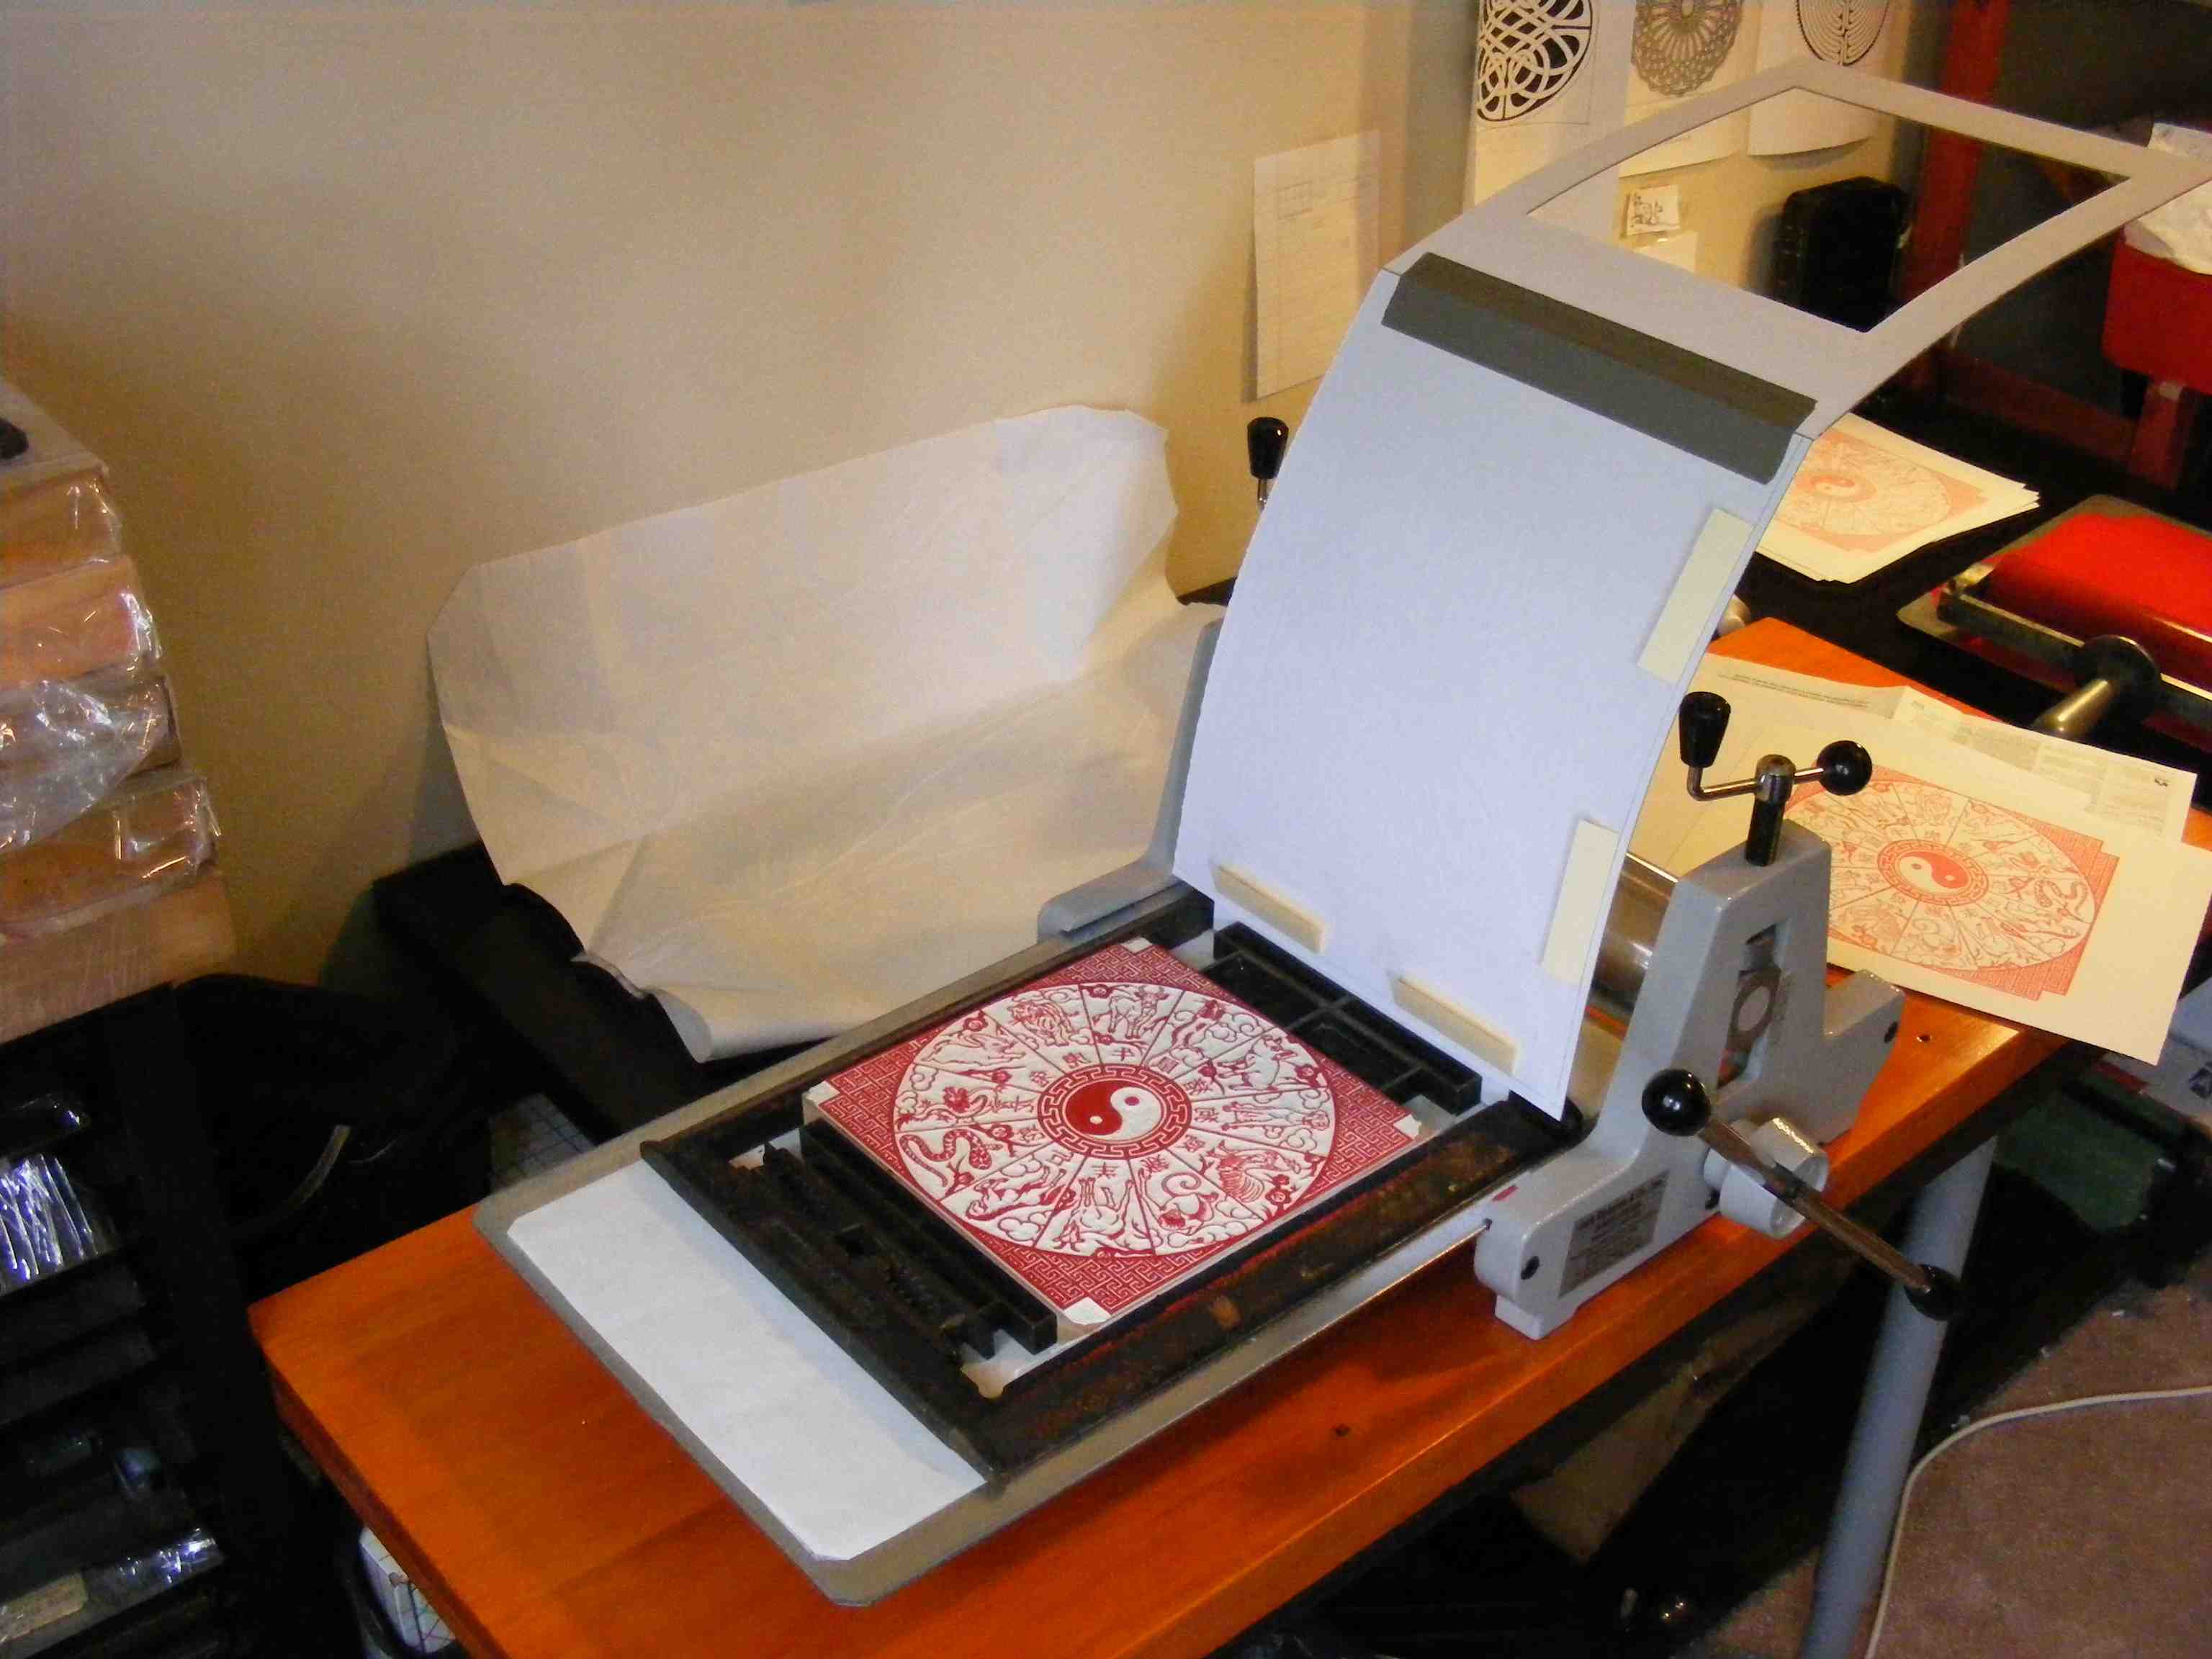
I finally got my printing equipment back after the move, so I was dying to use my little Richeson “baby” etching press. This little table-top press is great for any kind of printing techniques.

In the picture above you can see my printing set-up. I centered the block in the chase and laid it on the bed-plate of the press. I made the frisket out of a thin mat-board. The rigidness of the mat board worked much better than the flimsy folders I have used in the past. Instead of gauge-pins, I used bits of manila folder to align my paper in the frisket.

Here is the block with the finished print. I am quite happy with the way this print turned out!

For information on how to purchase this print, go to http://www.porcuprints.com/gallery/zodiac/

Share
Posted in Uncategorized | Tagged , | Comments Off on Printing The Zodiac

Dry Proofing

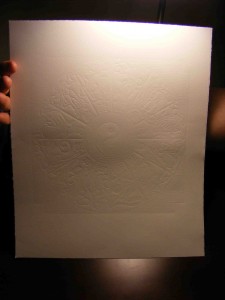
When getting your press set up and ready to print, you have to make certain adjustments based on the variable height of parts of your block and the pressure on the press. You definitely want to make these adjustments BEFORE you start messing with ink. The best way to do this is to “Dry Proof.” Essentially, this is just running sheets of paper through your press setup without ink so you can see the impression it leaves on the paper. This can show you low areas that you may need to shim up  or where you need to increase/decrease the pressure on your press.

I ran many a dry proof of my Zodiac block before printing it. Here is what a Dry Proof looks like when held underneath a light:

Once you are happy with the evenness of pressure on the dry proof, then you can pull out the ink and begin running artist’s proofs.

Note: Don’t use your good paper for the dry proofs! Any cheap multi-purpose paper works fine.

Share
Posted in Uncategorized | Tagged , | Comments Off on Dry Proofing

Devcon 2-Ton Epoxy

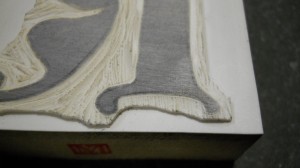
Sometimes artists make mistakes. I am definitely one of those artists. In woodcut or wood-engraving, the mistake usually occurs when the carving tool slips and carves/gauges out areas you really, really didn’t want to carve. For example, while carving the Mac Plus block, I managed to make a serious mistake and my tool slipped right through the outer edge.

Luckily Richard Woodman, the creator of Resingrave, has a solution. Because Resingrave is made of a thick layer of epoxy resin, it can be repaired with an off-the-shelf epoxy resin repair kit. Woodman suggests using Devcon’s “Two-Ton Epoxy” White.

This kit contains two tubes, one containing the epoxy, the other a hardener. When the two are mixed together, they create a chemical reaction that hardens the resin and makes it possible to re-carve your block.

Steps for repairing with devcon’s epoxy kit:

1. Clean the area of your mistake with acetone.

2. Mix together a small amount from each of the kit’s tubes.

3. Using a toothpick or something similar, apply the mixture into the cavity. Make sure there are no air bubbles trapped inside. Slightly overfill the area.

4. Let the epoxy dry for about 2 hours.

5. Sand the excess resin away with a very fine grit sandpaper. Make sure that you do not damage the surrounding parts of the image.

6. After sanding, let the epoxy redry for another 12 hours before re-carving the area.

NOTE: The back of the kit has completely different wait times listed. I am using Woodman’s timing suggestions from his book, Relief & Intaglio Printmaking Methods on Resingrave Blocks.

Here is what the Mac Plus repair looks like when finished:

It is hard to see, but I was not able to get the “White” epoxy kit that Woodman suggests. Instead, I got the clear drying version. It did not really matter all that much, but it did make it a little harder to see where to re-carve once everything was dry and sanded.

Share
Posted in Uncategorized | Tagged , , , | Comments Off on Devcon 2-Ton Epoxy

Resingrave: Milling out Unwanted Spaces

Printmakers love Resingrave for its ability to hold crisp lines and details. It resists bruising and, thanks to the new formula, it seldom chips.  Unfortunately, our designs don’t always fit exactly on the block and we are left trying to figure out the best way to carve out large blocks of space. George Alexander Walker, author of The Woodcut Artist’s Handbook: Techniques and Tools for Relief Printmaking, suggests using a Dremel with a rotary bit for clearing large areas of space. The problem with this option is that, unless the Dremel is a regular part of your tool arsenal, you may find it unwieldy and difficult to control (I know I certainly don’t want to risk slipping and dremelling through all my hard work!). In addition, it may take several passes to get the Dremel cuts deep enough so they won’t print.
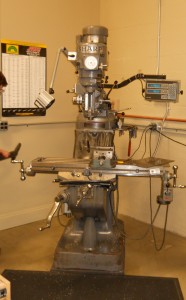
In light of this problem, Doug and I experimented with using a milling machine to cut away the unwanted space. He has access to a manual mill and tooling through work, and is encouraged to use it for personal projects.

TECHNICAL SPECS:

Mostly I left the machining details to Doug, since I am old school and have a tendency to break big machines (or small machines for that matter). But here are the technical specs that I was able to understand:

.
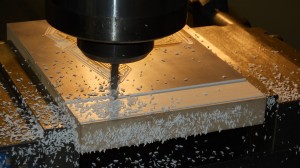
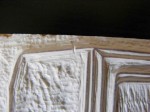
You can see where the first pass on the edge of the block is just a little too deep, so we corrected on subsequent passes. Also note the white flakes everywhere; a good sign, and no chipping!

We used a Sharp LMV knee mill, a stout, capable, and somewhat improved copy of the venerable Bridgeport Series 1 mill, still found in thousands of machine shops.

To cut, we used a 1/4″ two flute  high speed steel end mill (i.e. the bit).

We took a .055″ deep cur into the block (at first we used a .075″ cut down but it was just a little bit too deep for comfort, i.e. I didn’t want to risk hitting the underlying MDF).

We moved the plate back and forth under the cutting tool, removing a slim strip of material each time. For every pass we used a .1″ wide cut at a feed rate of 12 inches per minute (approximately 1 turn of the handle per second).

RESULTS:

As I mentioned before, our first pass was just a little too deep, so we had to back it off just a few hundredths of an inch and the shallower cut worked much better. I suppose you could even do a shallower cut than we did, but I wanted a deep cut.

I was actually quite pleased with the way the mill work turned out. The slow speed ensured that the resin did not overheat and melt and/or chip. It did produce an unbelievable number of little white  flakes, which regularly had to be brushed or blown out of the way of the bit, but this was expected.
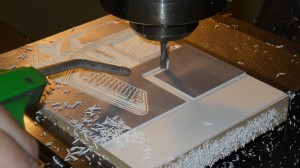
Bounding the cuttable area. Note the green pump blowing air on the end mill to keep the flakes from interfering with the cut

For areas that were closer to the design, we bounded the areas around which we would cut before making the individual passes. This gave us a clear visual of where to continue cutting. Given the accuracy of the milling machine, we probably could have gotten much closer to the edge of the design, but for the first attempt, we worked conservatively. We left approximately a 1/4- 1/3rd of an inch  space between the design and the milled areas. I will go back and finish clearing out the gaps with a scorper (my personal favorite is the L.C. Lyons #54 rounded bent shaft graveur).

Overall, this experiment was a success! The milling machine produced a very clean line. It did not threaten the integrity of the block itself. In addition, because the speed and the number of movements were limited by the machine, there was no possibility of cutting into your design by mistake (unless you were REALLY not paying attention…).
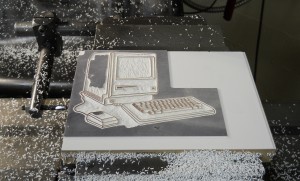
With the block pictured above, we only used straight lines to cut around the block. We also experimented with milling around contours on an old student practice block I had lying around. This is more complicated because the machinist must move the X and Y axes together in almost a zig-zag pattern to create a curved line. Essentially, one must learn how to “drive” the machine, and it takes practice. Unlike with the straight lines, with this technique it is quite easy to mess up and cut too close to your design. So, if you try this, be careful!
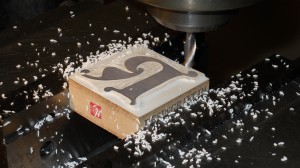
P.S.- This post is an artist’s take on the whole process. I certainly do not understand the interworking of the milling machine as well as I ought. As a more experienced machinist, Doug has written a much more technical description of the experiment on his blog: http://www.burnettecreative.com/2011/04/resingrave-speeds-and-feeds
Share
Posted in Uncategorized | Tagged , , , , | Comments Off on Resingrave: Milling out Unwanted Spaces

International Hug-a-Medievalist Day!

Dear Readers:

Today, as I have just discovered, has been appointed “International Hug a Medievalist Day! This long overdue holiday has made a splash on Facebook with almost 5,000 attendees. It has also found its way to the New Yorker online where Macy Halford has written a humorous and all too true argument on behalf of the holiday. You can find it here. My favorite line reads:

Perhaps because they delight in details and see worlds within them, medievalists are uniformly possessed of an excellent if slightly juvenile sense of humor, which becomes more pronounced when they drink and their inherent social awkwardness wears off. They drink most nights, usually at dimly lit pubs or sitting in tight clusters on the floors of grad-student apartments, and they prefer to drink red wine or ale.

I offer a choice quote to whet your appetite, but to get the full effect, you must read Ms. Halford’s article.

So please, go hug your favorite medievalist and spread the love!

Share
Posted in Uncategorized | Comments Off on International Hug-a-Medievalist Day!

Mac Plus Project

Last year my trusty Mac Powerbook G4 threatened to die on me. The “Y” key stuck and the down arrow didn’t work at all. It was slowing down and crashing at the most inopportune times. Of course this was in the midst of trying to write/finish my Masters Thesis, so we couldn’t let that happen. I got a shiny new laptop and finished my thesis while the old Powerbook sat alone in the corner feeling neglected.

Then, Doug’s (my boyfriend, and live-in tech support) laptop started acting up! His screen died! So, we had one computer whose keyboard didn’t work and one whose screen didn’t work. Of course Doug had to take them both apart and Frankenstein a whole laptop together from the working parts.

So what does this story have to do with printmaking you ask? Well, all the leftover parts from Doug’s Franken-computer gave me an idea for a great mixed media project. What if I framed a print of an antiquated Mac computer in the screen frame of a modern Mac laptop? I mean, you have to have a silly, fun project every once in a while!

So I designed a small line drawing of a Mac Plus Computer. The Mac Plus was the third computer Macintosh ever put out. It was introduced in 1986. Doug still has his, of course, for nostalgic purposes. I think he can still play Sim Ant or some other obscure computer game on it….

Anyway, here is the design for this project:

Share
Posted in Uncategorized | Tagged | Comments Off on Mac Plus Project