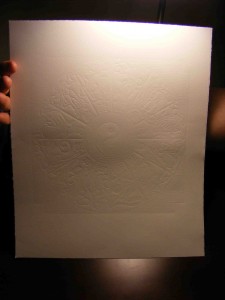
When getting your press set up and ready to print, you have to make certain adjustments based on the variable height of parts of your block and the pressure on the press. You definitely want to make these adjustments BEFORE you start messing with ink. The best way to do this is to “Dry Proof.” Essentially, this is just running sheets of paper through your press setup without ink so you can see the impression it leaves on the paper. This can show you low areas that you may need to shim up or where you need to increase/decrease the pressure on your press.
I ran many a dry proof of my Zodiac block before printing it. Here is what a Dry Proof looks like when held underneath a light:

Once you are happy with the evenness of pressure on the dry proof, then you can pull out the ink and begin running artist’s proofs.
Note: Don’t use your good paper for the dry proofs! Any cheap multi-purpose paper works fine.
