Printmakers love Resingrave for its ability to hold crisp lines and details. 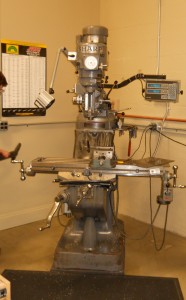 It resists bruising and, thanks to the new formula, it seldom chips. Unfortunately, our designs don’t always fit exactly on the block and we are left trying to figure out the best way to carve out large blocks of space. George Alexander Walker, author of The Woodcut Artist’s Handbook: Techniques and Tools for Relief Printmaking, suggests using a Dremel with a rotary bit for clearing large areas of space. The problem with this option is that, unless the Dremel is a regular part of your tool arsenal, you may find it unwieldy and difficult to control (I know I certainly don’t want to risk slipping and dremelling through all my hard work!). In addition, it may take several passes to get the Dremel cuts deep enough so they won’t print.
In light of this problem, Doug and I experimented with using a milling machine to cut away the unwanted space. He has access to a manual mill and tooling through work, and is encouraged to use it for personal projects.
TECHNICAL SPECS:
Mostly I left the machining details to Doug, since I am old school and have a tendency to break big machines (or small machines for that matter). But here are the technical specs that I was able to understand:
.
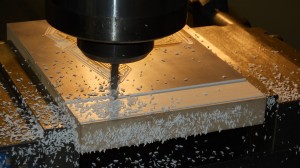
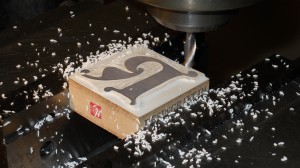
You can see where the first pass on the edge of the block is just a little too deep, so we corrected on subsequent passes. Also note the white flakes everywhere; a good sign, and no chipping!
We used a Sharp LMV knee mill, a stout, capable, and somewhat improved copy of the venerable Bridgeport Series 1 mill, still found in thousands of machine shops.
To cut, we used a 1/4″ two flute high speed steel end mill (i.e. the bit).
We took a .055″ deep cur into the block (at first we used a .075″ cut down but it was just a little bit too deep for comfort, i.e. I didn’t want to risk hitting the underlying MDF).
We moved the plate back and forth under the cutting tool, removing a slim strip of material each time. For every pass we used a .1″ wide cut at a feed rate of 12 inches per minute (approximately 1 turn of the handle per second).
RESULTS:
As I mentioned before, our first pass was just a little too deep, so we had to back it off just a few hundredths of an inch and the shallower cut worked much better. I suppose you could even do a shallower cut than we did, but I wanted a deep cut.
I was actually quite pleased with the way the mill work turned out. The slow speed ensured that the resin did not overheat and melt and/or chip. It did produce an unbelievable number of little white flakes, which regularly had to be brushed or blown out of the way of the bit, but this was expected.
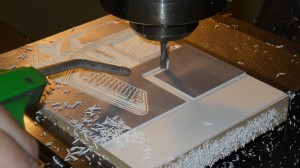
Bounding the cuttable area. Note the green pump blowing air on the end mill to keep the flakes from interfering with the cut
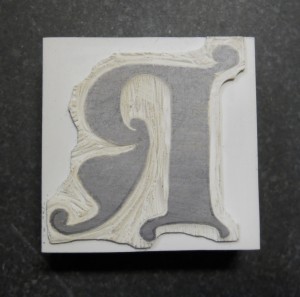
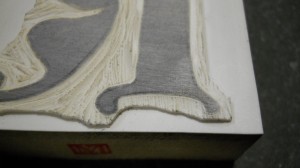
For areas that were closer to the design, we bounded the areas around which we would cut before making the individual passes. This gave us a clear visual of where to continue cutting. Given the accuracy of the milling machine, we probably could have gotten much closer to the edge of the design, but for the first attempt, we worked conservatively. We left approximately a 1/4- 1/3rd of an inch space between the design and the milled areas. I will go back and finish clearing out the gaps with a scorper (my personal favorite is the L.C. Lyons #54 rounded bent shaft graveur).
Overall, this experiment was a success! The milling machine produced a very clean line. It did not threaten the integrity of the block itself. In addition, because the speed and the number of movements were limited by the machine, there was no possibility of cutting into your design by mistake (unless you were REALLY not paying attention…).
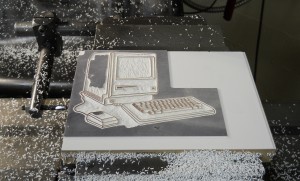

With the block pictured above, we only used straight lines to cut around the block. We also experimented with milling around contours on an old student practice block I had lying around. This is more complicated because the machinist must move the X and Y axes together in almost a zig-zag pattern to create a curved line. Essentially, one must learn how to “drive” the machine, and it takes practice. Unlike with the straight lines, with this technique it is quite easy to mess up and cut too close to your design. So, if you try this, be careful!
P.S.- This post is an artist’s take on the whole process. I certainly do not understand the interworking of the milling machine as well as I ought. As a more experienced machinist, Doug has written a much more technical description of the experiment on his blog: http://www.burnettecreative.com/2011/04/resingrave-speeds-and-feeds

