Free Shipping Day, Dec. 16!

Porcuprints will be participating in Free Shipping Day on December 16th! For those of you who are unfamiliar with this strange day, it is a day when many online retailers offer free shipping to customers with delivery by Christmas Eve.

Free Shipping Day

Each store has their own promotional methods. To get free shopping from me, Porcuprints, just go to Etsy, add a print to your cart, and enter coupon code FREESHIPDAY2011 at checkout!

To go directly to my Etsy Store, click the Etsy logo!

You can also click on the free shipping day badge to see all the other wonderful online shops participating in this event.

Share
Posted in Uncategorized | Tagged , , | Comments Off on Free Shipping Day, Dec. 16!

Crafty Wonderland!

This weekend I attended Crafty Wonderland’s “Colossal Holiday Sale.” Held at the Oregon Convention Center, the show brings together over 200 local artists and craftspeople from the Pacific Northwest. It promotes itself as an opportunity to “BUY LOCAL! BUY HANDMADE!” and support local artists.

My attendance was as a shopper, not a seller. I wanted to check it out and it did not disappoint. Some old favorites of mine were there, like Fortress Letterpress, and many local artists who I have never seen before!

However shallow it may make me seem, I did arrive early to get one of the “goodie bags” for the first 150 people. The bag included some letterpress cards and postcards, which I was excited about. It also had a couple of pairs of earrings, and some magnets, all of which are going to make great Christmas presents!

The Framework Design Lab had a surprisingly fresh booth that stood out to me. The Framework Design Lab is actually a graphic design student group of Oregon State University that was luck enough to be accepted into the show. It was great to see students getting their work and creativity out there! You can learn more about the group here: http://frameworkdesignlab.tumblr.com/

The only thing I purchased was a felt bacon Christmas ornament from PickleThings. It is truly adorable! I bought it as a present, and I have already wrapped it up, or I would have taken a picture of it.

All in all, it was a great craft show and I would definitely go again. Hopefully next year I will have the ability to enter as a seller, instead.

For more on Crafty Wonderland, check out their website here: http://craftywonderland.com/

And to see a list of other vendors who attended the show: http://craftywonderland.com/vendors/

Share
Posted in Uncategorized | Tagged , , , , , , , , , | Comments Off on Crafty Wonderland!

Porcuprints Featured in Blog

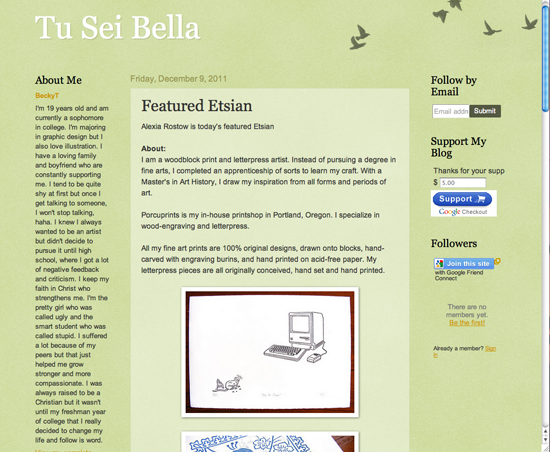
Rebecca Tomb, on Etsy as BeckyTDesigns, just featured Porcuprints on her blog!

Here’s her feature!: http://beckytdesigns.blogspot.com/2011/12/featured-etsian.html

Share
Posted in Uncategorized | Tagged , , , , , | Comments Off on Porcuprints Featured in Blog

New Etsy Listing

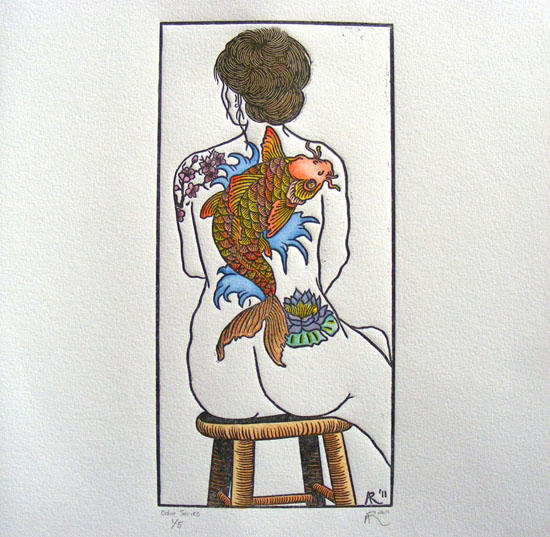
My latest listing on Etsy has just gone live! It is a hand-colored version of “Don’t Play Koi with Me!” I used calligraphy inks and watercolors for the color. Also, I added a calligraphy gold ink in the tail and body to make the koi fish scales pop!

Click on the image to see the Etsy listing and more photographs!

Share
Posted in Uncategorized | Tagged , , , , , , , , , , , , , , | Comments Off on New Etsy Listing

Final Press Photographs

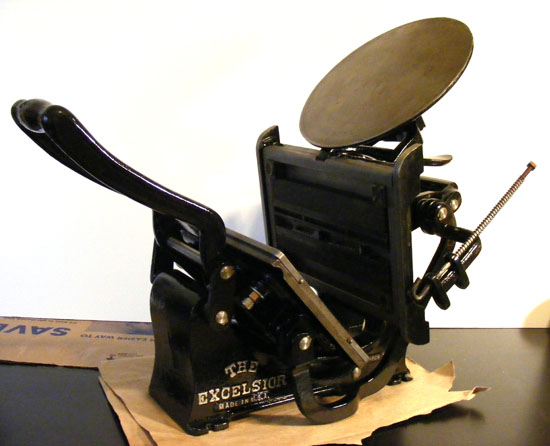
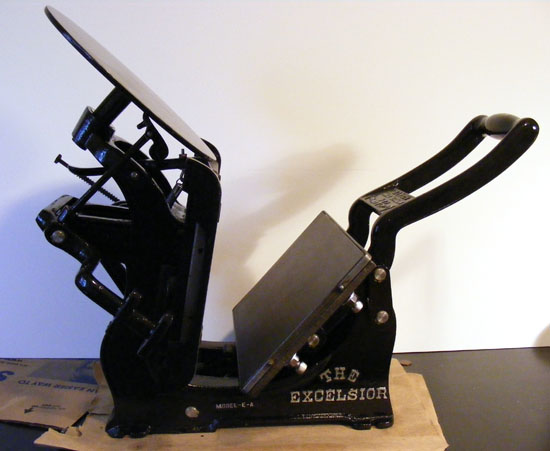
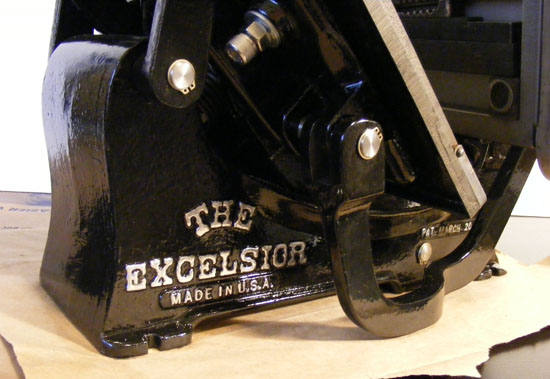
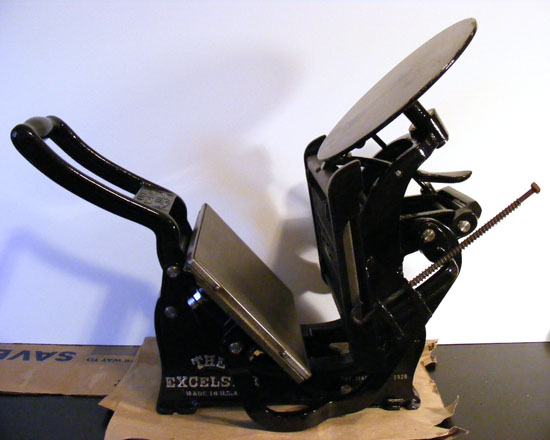
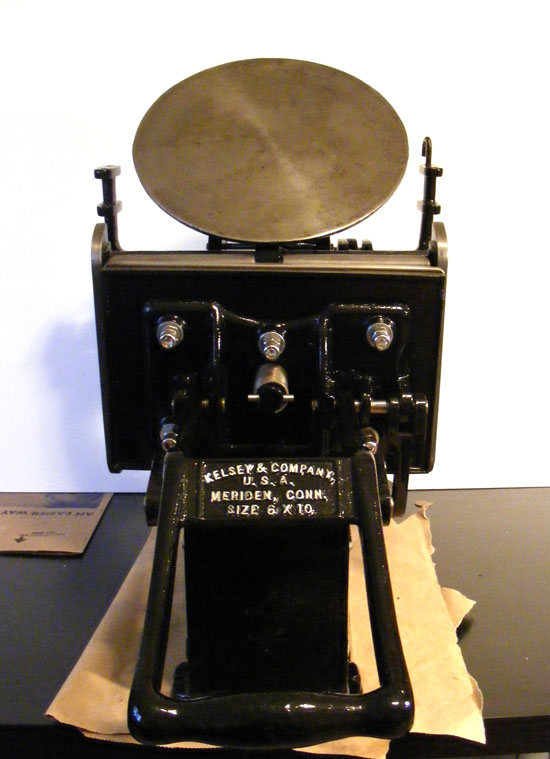
Every part of the Kelsey press has finally been put back together! And here are pictures!

The only thing missing are the roller hooks. The old ones are bent and I believe we will have to make new ones. Other than that, it’s finished.

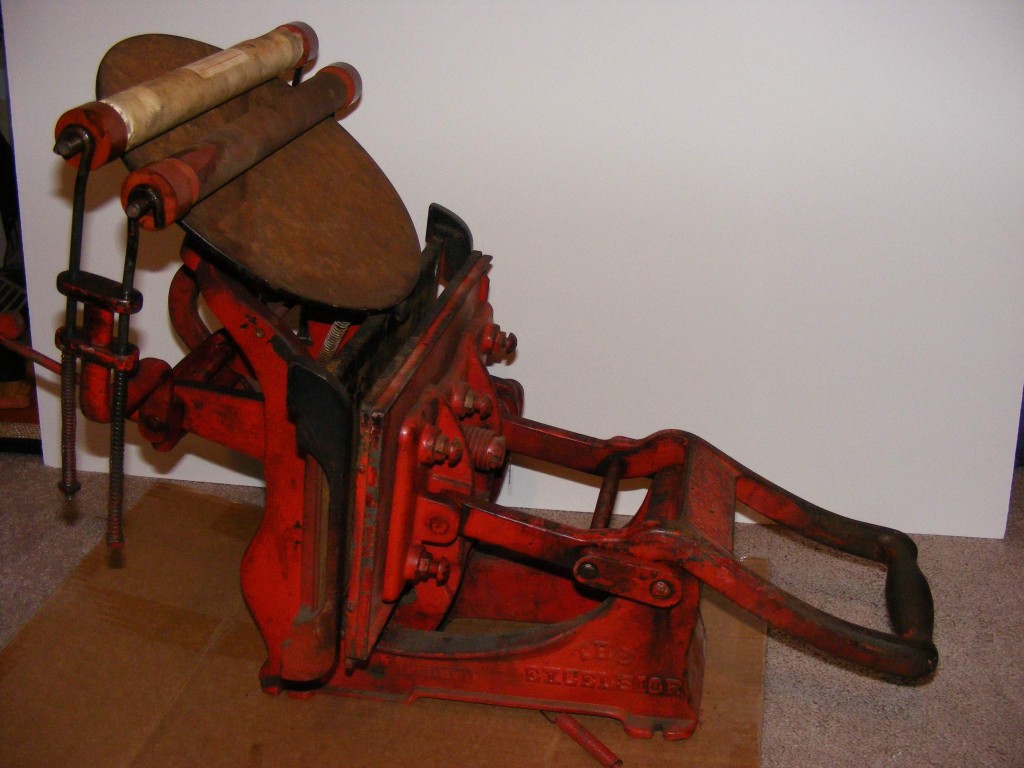
This is what it looked like BEFORE:

And AFTER:

The next step is to make a beautifully crafted wooden base for the press. This will stabilize the press and have handles for more easily carrying.


Share
Posted in Uncategorized | Tagged , , , , , | Comments Off on Final Press Photographs

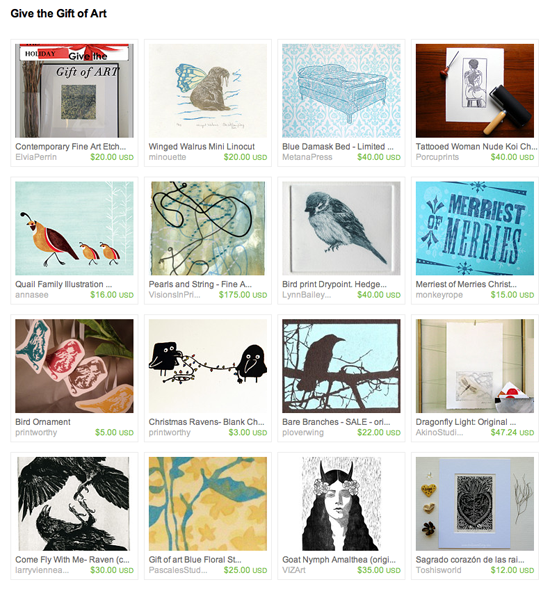
Give the Gift of Art

“Don’t Play Koi with Me” was featured in a wonderful treasury this evening! Kelly Tankersley from  88editions put together a treasury featuring some wonderful artists, including my piece.

Thanks Kelly! You made my day!


Share
Posted in Uncategorized | Tagged , , , , , , , , | Comments Off on Give the Gift of Art

December’s First Friday Art Walk

It’s that time of the month again! December’s First Friday Art Walk is upon us! Don’t forget to show support for Etsy sellers on December 2nd.

For those of you who don’t know, FFAW is Etsy’s version of going on a First Friday art gallery walk/tour. Except here you don’t have to leave your couch. Just cuddle up to your loved one, or a nice glass of wine, and search Etsy for “firstfridayartwalk.” I promise you will discover some extraordinary artists!

Share
Posted in Uncategorized | Tagged , , , | Comments Off on December’s First Friday Art Walk

Press Restoration Update: Grease & Shims

Shims and grease are two things that are quite important when reassembling a press, and I did not want them to get lost in the glitz and glam of retaining rings and finished pictures. While they aren’t as pretty, they are necessary!

Shims:
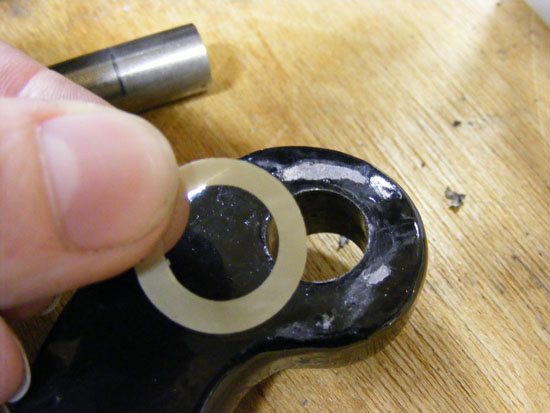
When we first started fitting the dowels in the press, I noticed that some of the cast parts were rubbing quite hard against each other. This was removing paint, and could easily wear the castings over time. In the places that this occurred, I cut some circles out of some plastic shim stock (I think I used .003mm thickness). I didn’t want to add a thick layer between the castings. I just wanted to put a buffer between the castings to reduce metal-on-metal rubbing.

One of the places that needed a shim was at the top of the goose neck (or bow). This part attaches to the carriage and is under a bit of tension when fitted together. I REALLY don’t want to have to replace a broken carriage or a broken goose neck, so avoiding wearing either of these castings is a high priority!

I also made shims for one of the handle connections, and maybe one or two other places where my press needed it. I assume that each press is different through, so where you put shims may be totally different from where I needed them.

Grease:
This press probably had not been greased for a good 30 years or more. Now that it was all clean and had new dowels, it needed new grease. One of the advantages of having access to a machine shop is also having access to some things that one might not otherwise be able to get (or at least get cheaply).

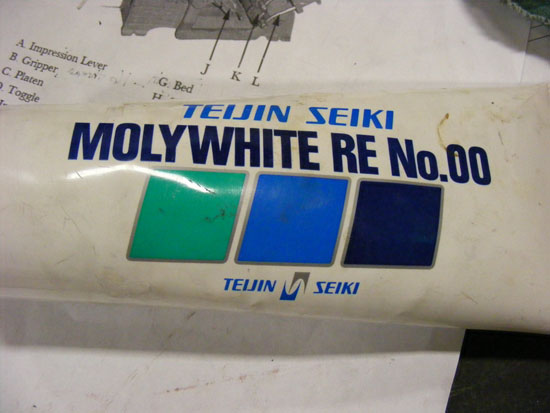
The grease we used for the press was Teijin Seiki’s Molywhite RE No. 00. This is a lubricating grease is used specifically for manufacturing robots and robotic gears!

Of course, this high end lubricating grease worked amazingly well. I am quite sure that others will know of more appropriate greases to use on a press, but this is what we had access to. It produced smooth movement throughout the press.

Finishing touches and final assembly photos to follow!


Share
Posted in Uncategorized | Tagged , , , , , , , , , , , , | Comments Off on Press Restoration Update: Grease & Shims

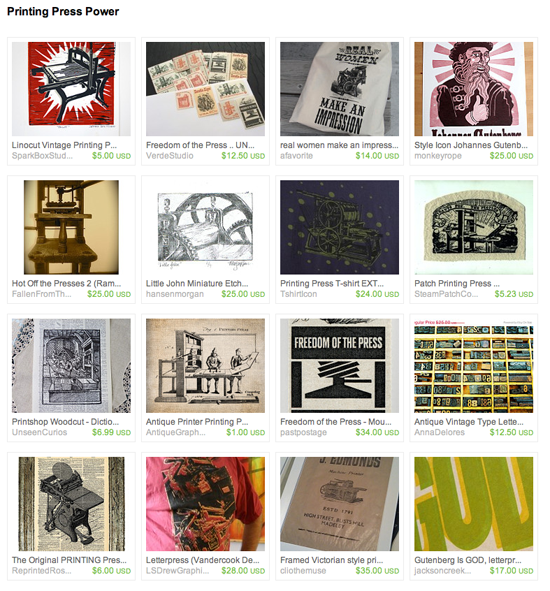
Printing Press Power

Just created a treasury in honor of my Kelsey Excelsior letterpress that I just finished restoring this weekend! Enjoy.

Share
Posted in Uncategorized | Tagged , , , , , | Comments Off on Printing Press Power

Press Restoration Update: Cutting & Fitting New Dowels

When I first disassembled the Kelsey press I knew that I would have to replace the original dowels that held the parts together. The majority had been mushroomed on one end and deformed with a chisel and hammered into the other. I can only assume that this was done by the Kelsey company to stop people from taking the press apart. These presses really weren’t meant to last as long as they have, so I suppose replacing the dowels was not a priority for the Kelsey Co. Either that, or a previous owner replaced the rods very badly.
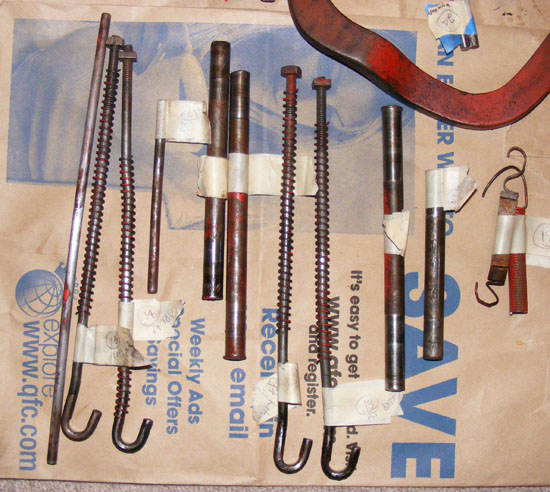
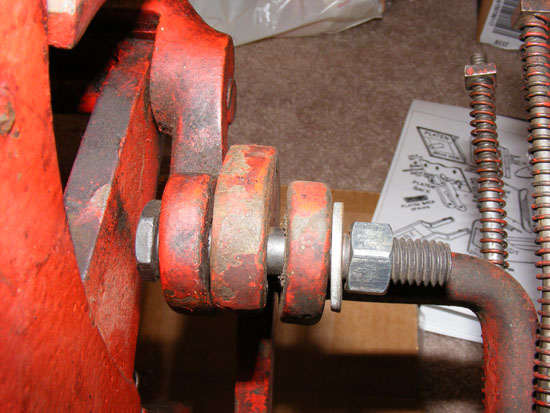
The original dowels were all covered in old stray paint, grease, and decades of gunk. There was even a place where someone had tried to replace one of the dowels with a nut and bolt that didn’t fit:
Needless to say, we decided to replace the dowels. We bought a 1/2″ diameter stainless steel, mill-finished rod from McMaster-Carr (one of Doug’s absolute favorite mail order parts places) and brass retaining rings to fit.

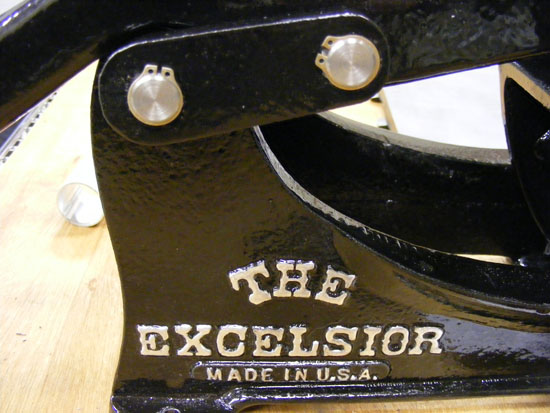
We went with stainless steel because it is hard, doesn’t rust, and will last forever. And, instead of re-mushrooming the dowels, we decided to use retaining rings to hold the rods in place. Retaining rings are amazing little fasteners that are designed to fit into a groove on a shaft. Once installed, the retaining ring holds the shaft in place. We got brass ones for no other reason than they would look beautiful when contrasted with the stainless steel rod and the black paint. I am sure you could use any number of different types and materials of retaining rings.

Because we were using the machine shop at Doug’s work, I was not allowed to work the lathe. That was all on Doug. So I wielded the CAMERA!
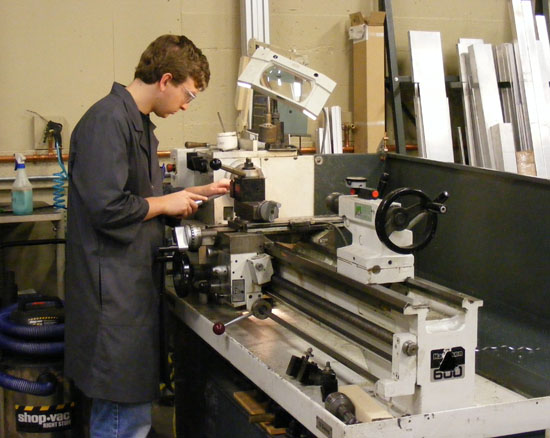
For each replacement dowel, we rough cut a piece of the rod approximately 1/2-3/4″ too long on each side, fitting the rod within the press pieces just to check.
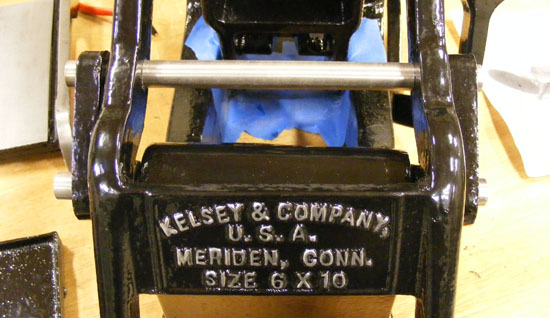
Then Doug got on the lathe and (1) finished one end of the dowel, (2) cut a groove into the side of the dowel about 1/8″ in from the end (for the retaining ring), and (3) filed the edge down for a smooth bevel.
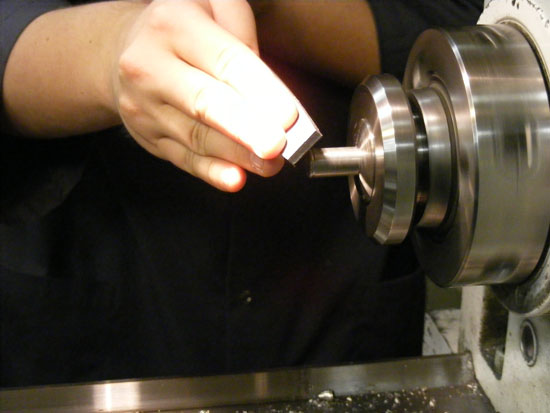
(You can see in the picture above that Doug has already cut the groove for the retaining ring and is in the process of filing the edge down.)

We then fit each dowel individually. We put a retaining ring on the finished side and slipped the dowel into its space. We then marked where the second retaining ring needed to be placed and Doug did the same thing for the other side.
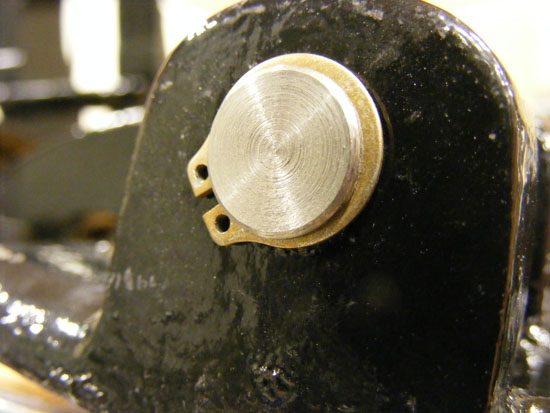
Not only do the brass retaining rings look quite elegant, they also allow us to pull the dowels out easily, should we ever need to fix and/or replace them.

Share
Posted in Uncategorized | Tagged , , , , , , , , , , , , | Comments Off on Press Restoration Update: Cutting & Fitting New Dowels